Recording
OpenShot can record a microphone, the desktop, and a webcam directly into the current project. You can enable one source or combine several in a synchronized recording session. Each source remains an independent media file and timeline clip, making it easy to adjust microphone volume, crop a webcam, or edit the screen capture separately.
Open the dedicated layout with View → Recording View, or show only the dock with View → Docks → Recording.
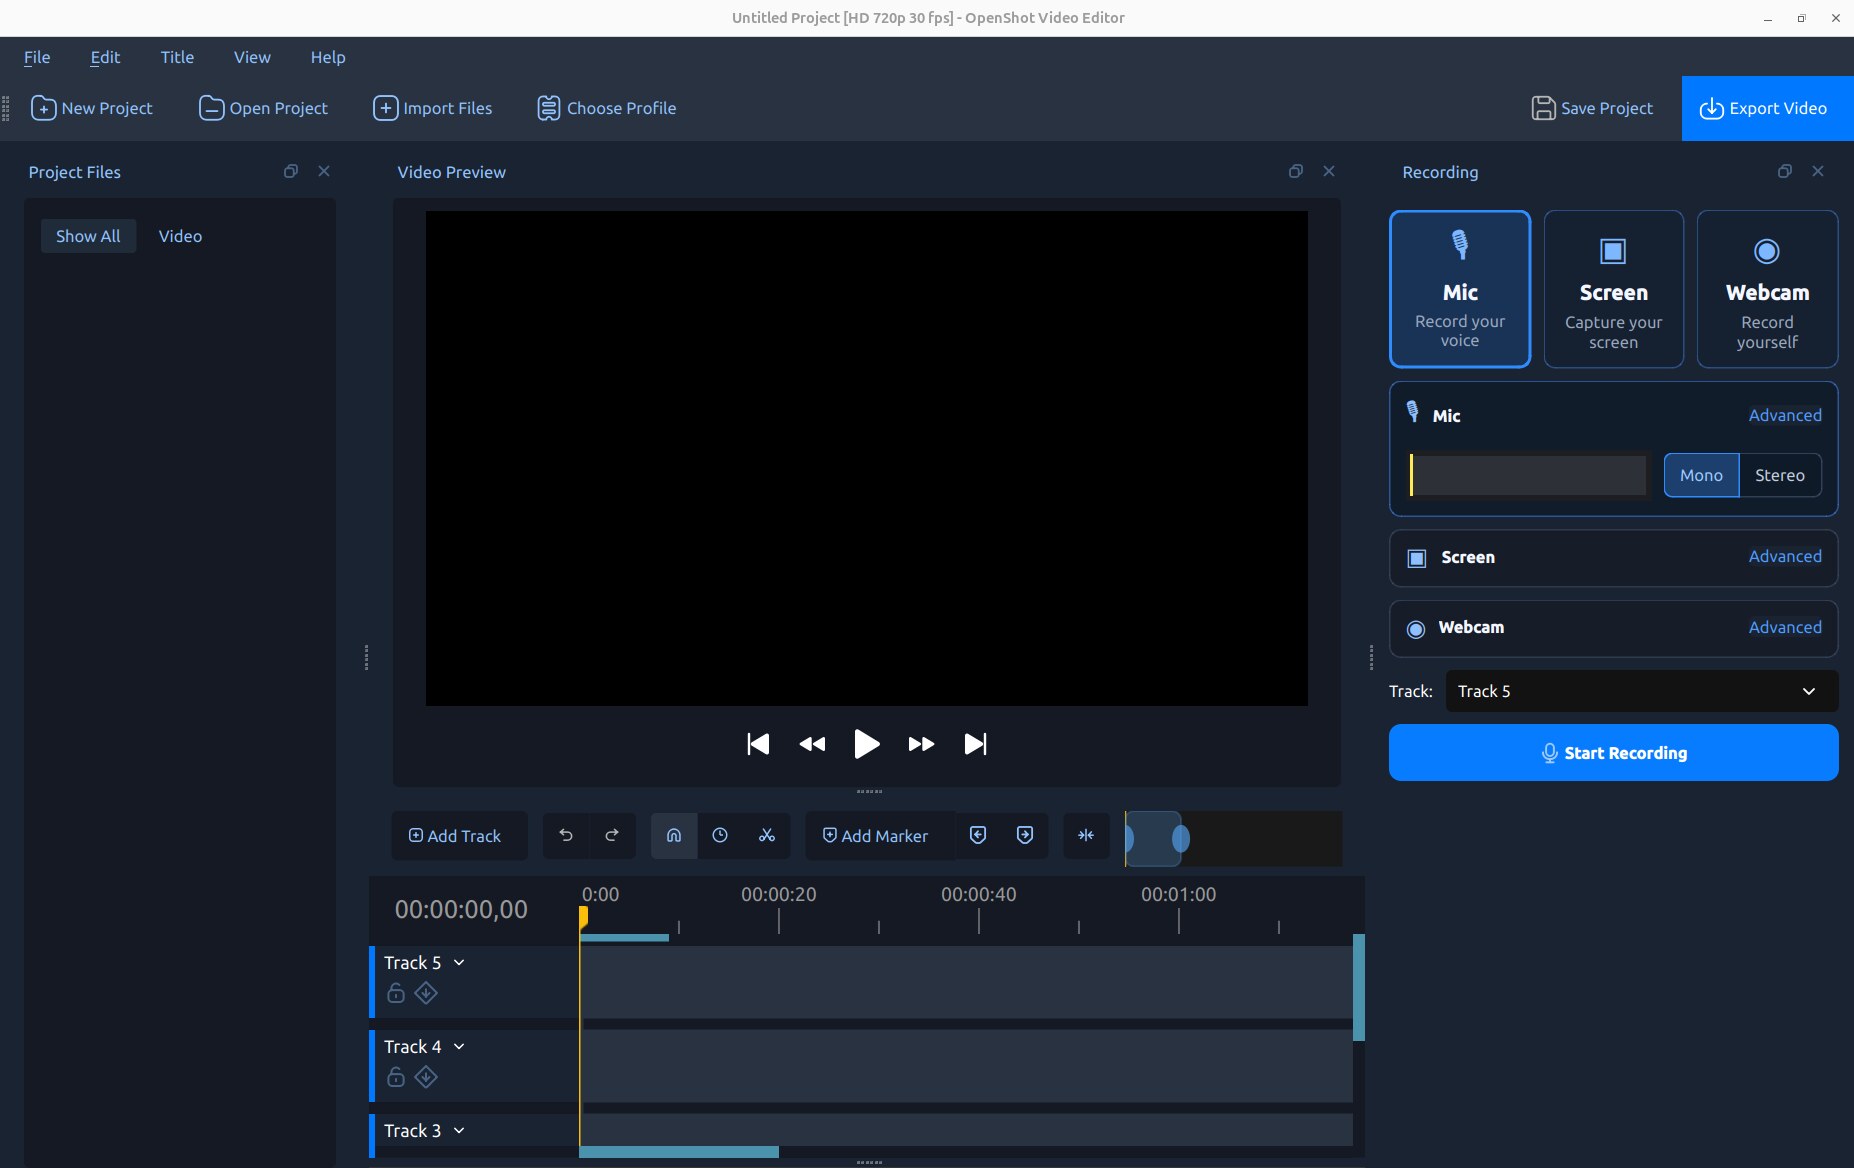
Quick Start
Move the timeline playhead to the point where the recording should begin.
Open View → Recording View.
Enable Mic, Screen, Webcam, or any combination of them.
Select the destination Track. Multiple sources use adjacent tracks automatically. Select No Track to add completed recordings to Project Files without creating live previews or clips on the timeline. Choose whether the timeline Preview should play during Mic or Webcam recording.
Open each source’s Advanced section and verify its device and quality options.
Click Start Recording. Perform the narration or action you want to capture.
Click Stop Recording, either in the dock or from the recording status control.
Wait briefly while OpenShot finishes the files. They are imported into Project Files and, unless No Track is selected, placed on the timeline.
Quick Audio Commentary
To begin commentary at an existing clip, right-click the clip and choose Audio → Record. OpenShot moves the playhead to the clip’s first frame, opens the Recording dock, and selects the first available unlocked track below the clip. Verify that Mic is enabled, then click Start Recording. The full View → Recording View remains the general entry point for screen, webcam, microphone, and combined recording sessions.
Recording Sources
The source cards at the top of the dock can be enabled independently. An unavailable card indicates that the required device, operating-system capture service, or libopenshot feature was not detected.
Source |
Recorded File |
Audio |
Typical Use |
|---|---|---|---|
Mic |
|
Microphone only |
Narration, voice-over, commentary, or interviews. |
Screen |
|
Optional system audio |
Tutorials, demonstrations, presentations, or games. |
Webcam |
|
No audio |
Presenter video or a picture-in-picture camera. |
When Mic and Screen are enabled together, microphone audio is kept in its own file while system audio is embedded in the screen video. This separation is intentional: it lets you independently adjust, mute, fade, or process the voice and computer audio during editing. Webcam video has no audio, avoiding a duplicate microphone track and echo.
Live Feedback and Timeline Placement
The microphone meter responds before and during recording, which helps confirm that the selected input is working. During recording, OpenShot draws a temporary clip and live microphone waveform on the timeline. The completed files replace these previews after recording stops.
Select No Track in the Track list when you want to capture media without adding live objects or completed clips to the timeline. The finished recordings are still imported into Project Files, ready to preview, organize, or add to the timeline later. This is useful when recording several takes before choosing which one to edit.
All enabled sources start at the same timeline position. OpenShot stacks them in a useful compositing order:
Source |
Placement |
|---|---|
Webcam |
Highest assigned track, so a corner camera appears on top. |
Screen |
Below the webcam and above microphone audio. |
Mic |
Lowest assigned track because it contains audio only. |
If there are not enough tracks below the selected track, OpenShot creates or selects additional tracks as needed. Recordings are also added to Project Files, so they can be reused even if you remove their first timeline clips.
Timeline Preview During Recording
The Preview control beside Track can play the project from the current playhead while a Mic, Webcam, or combined Mic + Webcam recording is captured. This is useful for voice-over, commentary, and reaction videos. Stopping the recording also stops timeline playback when the recorder started it.
Option |
Behavior |
|---|---|
Off |
Records without starting timeline playback. |
Full |
Plays the timeline using the normal preview resolution. |
Half |
Reduces preview rendering resolution to improve recording performance. |
Quarter |
Uses the lowest preview resolution for demanding projects or slower computers. |
Preview resolution changes only the temporary OpenShot preview. It does not reduce the resolution or quality of the recorded Mic or Webcam files. Use headphones when the timeline contains audio so the microphone does not record the speakers. When Screen is selected, Preview is forced to Off and disabled; deselecting Screen restores the previous choice.
Microphone Recording
Enable Mic to record narration as a separate audio file. Use the Mono/Stereo control beside the level meter for the common channel choice, and open Advanced for all settings.
Option |
Typical Default |
Description |
|---|---|---|
Input |
System input |
Selects the microphone or audio-input device. |
Format |
FLAC |
Chooses WAV, FLAC, or MP3. FLAC is lossless with smaller files than WAV. |
Sample Rate |
48000 Hz |
Sets the recording sample rate. Match the device and project when possible. |
Channels |
Mono |
Records one or two input channels. Mono is usually best for one microphone. |
Aim for a healthy meter response without clipping. A quiet waveform should remain visually quiet; OpenShot no longer normalizes every newly generated waveform to full height. The lighter peak envelope highlights transients while the solid RMS envelope summarizes sustained energy. Their detail is controlled by Edit → Preferences → Timeline → Waveform Samples (per second). See Context Menu for waveform display and audio volume controls after recording.
Screen Recording
Enable Screen, then choose a capture mode:
Mode |
Description |
|---|---|
Full Screen |
Captures the selected display or combined desktop area. |
Window |
Click a window to capture its bounds. Availability and exact behavior depend on the platform. |
Region |
Drag or select a rectangular desktop area. Availability depends on the platform. |
On Wayland desktops, the operating system’s sharing portal asks which screen or window to share when recording starts. The numeric window and region controls are hidden because selection belongs to that portal.
Screen Advanced Options
Option |
Default |
Description |
|---|---|---|
Screen |
Primary display |
Selects a display or the complete desktop when supported. |
Offset |
Selected bounds |
Sets the capture area’s X and Y desktop coordinates. |
Size |
Selected bounds |
Sets capture width and height. OpenShot uses encoder-safe even dimensions. |
FPS |
30 |
Sets the screen recording frame rate: 15, 24, 30, or 60 FPS. |
System Audio |
On |
Embeds computer playback audio in the screen MP4 when supported. |
Cursor |
On |
Includes the mouse pointer in the screen recording. |
Hide OpenShot |
No |
Temporarily hides OpenShot during selection and recording when enabled. |
Note
On some Windows systems using high-DPI display scaling, the mouse pointer may be displaced or missing from screen recordings made on a scaled display. If pointer visibility is important, record on a display configured at 100% scaling, temporarily set the target display to 100%, or use a separate screen-capture application. Screen video is still recorded normally, and setting Cursor to Off avoids the affected pointer overlay.
System Audio
System Audio is enabled by default on supported capture backends. It records sound playing through the computer—such as a game, browser, media player, or presentation—inside the screen recording. It does not replace the Mic source. Enable both sources when you want system audio and commentary on independently editable clips.
If the control is disabled, the active platform or libopenshot build does not provide system-audio capture. OpenShot forces the option Off rather than producing a misleading silent audio track. Operating-system privacy settings and audio-routing configuration can also affect capture.
Note
System Audio recording is not currently available on macOS. Screen video, microphone, and webcam recording remain available, but the System Audio option is disabled and forced to Off.
Warning
Avoid playing captured system audio through speakers while also recording a microphone unless that sound is intentional. Headphones reduce echo and prevent the microphone from recording the speakers a second time.
Webcam Recording
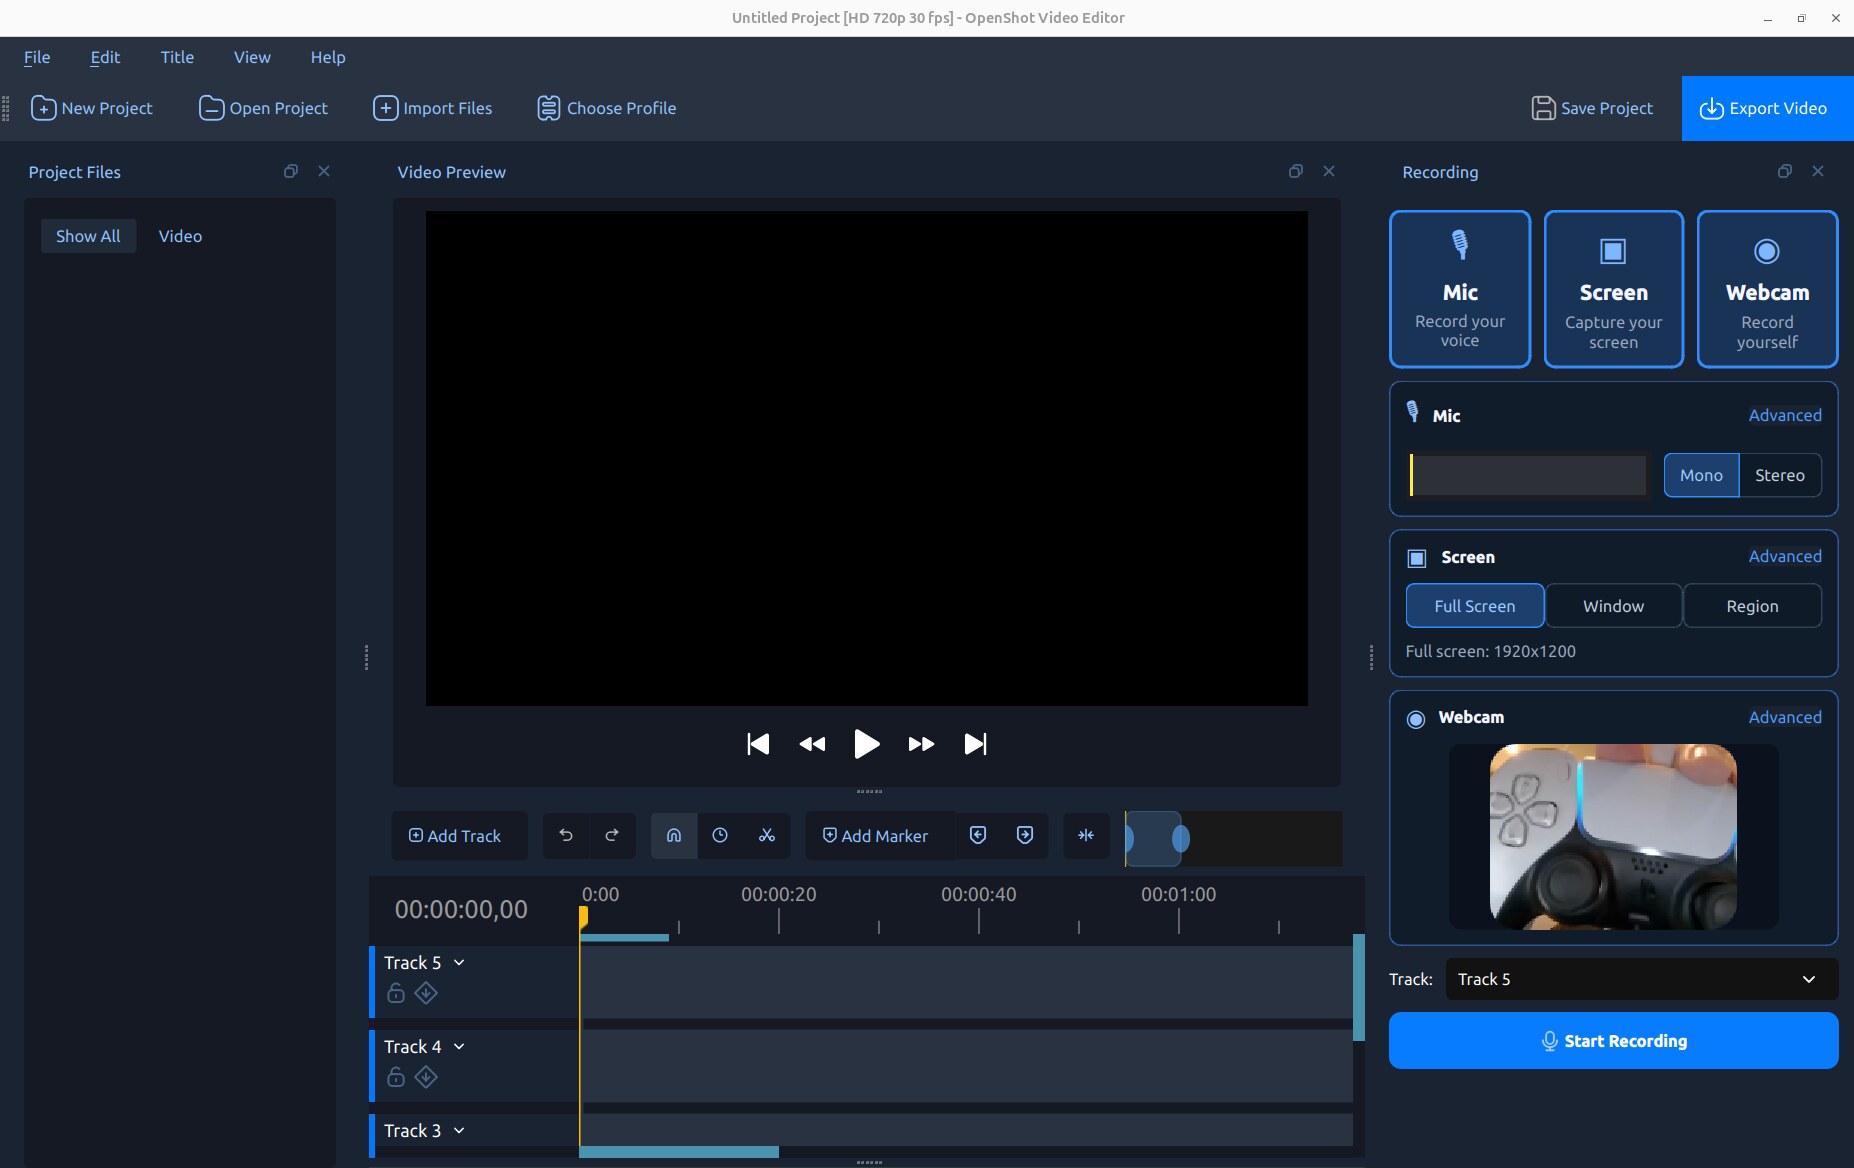
Enable Webcam to record a camera as a silent video clip. A live preview helps verify framing before you start. When Screen is also enabled, the default layout is a rounded, 30% camera in the bottom-right corner. When the webcam is recorded alone, it defaults to full size.
Option |
Description |
|---|---|
Input |
Selects an available webcam or video-capture device. |
Resolution |
Selects a resolution reported by the camera. |
Record FPS |
Selects a frame rate supported at the chosen resolution. |
Layout |
Chooses Bottom/Top Left/Right, Left, Right, Center, or Full Size placement. |
Size |
Sets a corner camera to 20%, 30%, or 40% of the project frame. |
Corners |
Uses Rectangle, Rounded, or Oval camera corners. |
Layout choices are applied as ordinary clip properties. After recording, use Gravity, Scale X, Scale Y, Margin, and Corner Radius to refine the result. See Clip Properties.
Combining Sources
The Recording View keeps all enabled source controls together while leaving the preview and timeline visible.
Workflow |
Enable |
Result |
|---|---|---|
Voice-over |
Mic |
One editable narration file. |
Silent tutorial |
Screen |
Screen MP4; turn System Audio Off if silence is desired. |
Game commentary |
Mic + Screen |
Separate mic clip plus screen video with game audio. |
Presenter camera |
Mic + Webcam |
Separate voice and silent camera video. |
Tutorial with camera |
Mic + Screen + Webcam |
Three synchronized clips with webcam above the screen. |
Where Recordings Are Saved
Recordings are saved in the project’s assets folder under recordings. If the project has not been saved yet,
OpenShot uses its user-data location. Filenames contain the source name and a timestamp; another numeric suffix avoids
overwriting a file created during the same second.
Save the project before a long or important session so its recording destination is predictable. Do not move or rename recorded files outside OpenShot while the project is using them.
Permissions and Platform Behavior
Screen and camera capture depend on operating-system services, hardware, and build support. The controls in the dock adapt to the available backend.
Linux/X11: Full-screen, window, and numeric region capture are available when the X11 capture backend is built.
Linux/Wayland: The desktop sharing portal chooses the capture source after recording starts.
Windows: Desktop capture uses the available Windows screen backend; camera devices use Windows capture services.
macOS: Screen capture uses the supported macOS backend, with window and region choices represented as cropped screen bounds when required. System Audio recording is not currently supported; microphone recording remains available as a separate audio source.
The first recording may trigger Screen Recording, Microphone, Camera, or desktop-sharing permission prompts. Approve the requested source, then restart OpenShot if the operating system requires it. A disabled source card or option is preferable to a recording that silently omits an unsupported source.
Troubleshooting Recording
Problem |
What to Check |
|---|---|
Mic meter does not move |
Select the correct Input, verify OS microphone permission, and check mute/gain. |
Mic clips or distorts |
Lower hardware/input gain and keep peaks below full scale. |
Mic is very quiet |
Raise input gain near the device; timeline waveform height does not change audio. |
System Audio is disabled |
The active screen backend/build does not support it; check platform audio routing. |
System Audio is silent |
Play audio before testing, verify the output device, and inspect OS privacy/routing. |
Voice contains game echo |
Use headphones so the mic does not capture speaker playback. |
Screen source is incorrect |
Re-select Full Screen/Window/Region; on Wayland, choose again in the portal. |
Cursor missing on Windows |
High-DPI scaling can affect the pointer overlay; try the target display at 100%. |
Webcam is unavailable |
Check camera permission, close other camera apps, and reconnect the device. |
Recording is choppy |
Lower screen/camera FPS or resolution and close CPU-intensive applications. |
Clips appear on wrong track |
Choose the top destination Track before recording, then move clips if needed. |
After Recording
Recorded clips behave like imported media. You can trim, slice, move, mute, fade, add effects, and adjust volume or layout with the standard editing tools. Useful next topics are:
Trimming & Slicing for trimming and slicing.
Context Menu for waveform, volume, fade, and other clip actions.
Clip Properties for webcam placement and detailed adjustments.
Playback for playback and audio troubleshooting.